
Send Custom Email With NextJS & NodeMailer
January 9, 2024

Kaustubh Ganekar
Learn how to use Nodemailer for sending HTML emails with images and attachments via SMTP, test and debug messages sent from your Node.js app.
ReactJS
NextJS
The idea of this article is to explain how to use the Node.js module Nodemailer and React Mail to send custom email templates.
In nodemailer we will focus mainly on SMTP and HTML to help you prepare and test email messages to send out with your Node.js backend using Nodemailer and later we will see how can we customize the email like adding Background Color, Images & Much more.
🗣️:- Nodemailer & React Mail makes sending a modernized email a piece of cake. Let’s see if they are talking about cooking or eating 🙂
What is Nodemailer?
Nodemailer is a single module with zero dependencies for Node.js, designed for sending emails.
Its main features include (but are not limited to):
- Platform-independence
- Security, in particular, email delivery with TLS/STARTTLS and DKIM email authentication
- Unicode support
- HTML content and embedded image attachments
- Different transport methods besides SMTP support.
How to use Nodemailer: From Installation
The only thing required to start using Nodemailer module is the server-side tool Node.js version 6.0 or above.
You should also install Nodemailer itself but it’s really easy with the npm or Yarn package manager.
Execute the following command in the Node.js command prompt:
npm install nodemailer --save
or
yarn add nodemailer
Once completed, include it into your web application with the following code:
var nodemailer = require('nodemailer');
or this if you are using ES modules:
import nodemailer from ‘nodemailer’;
How to send emails with Nodemailer?
For your app to send transactional and other types of emails with Nodemailer, there are three main steps.
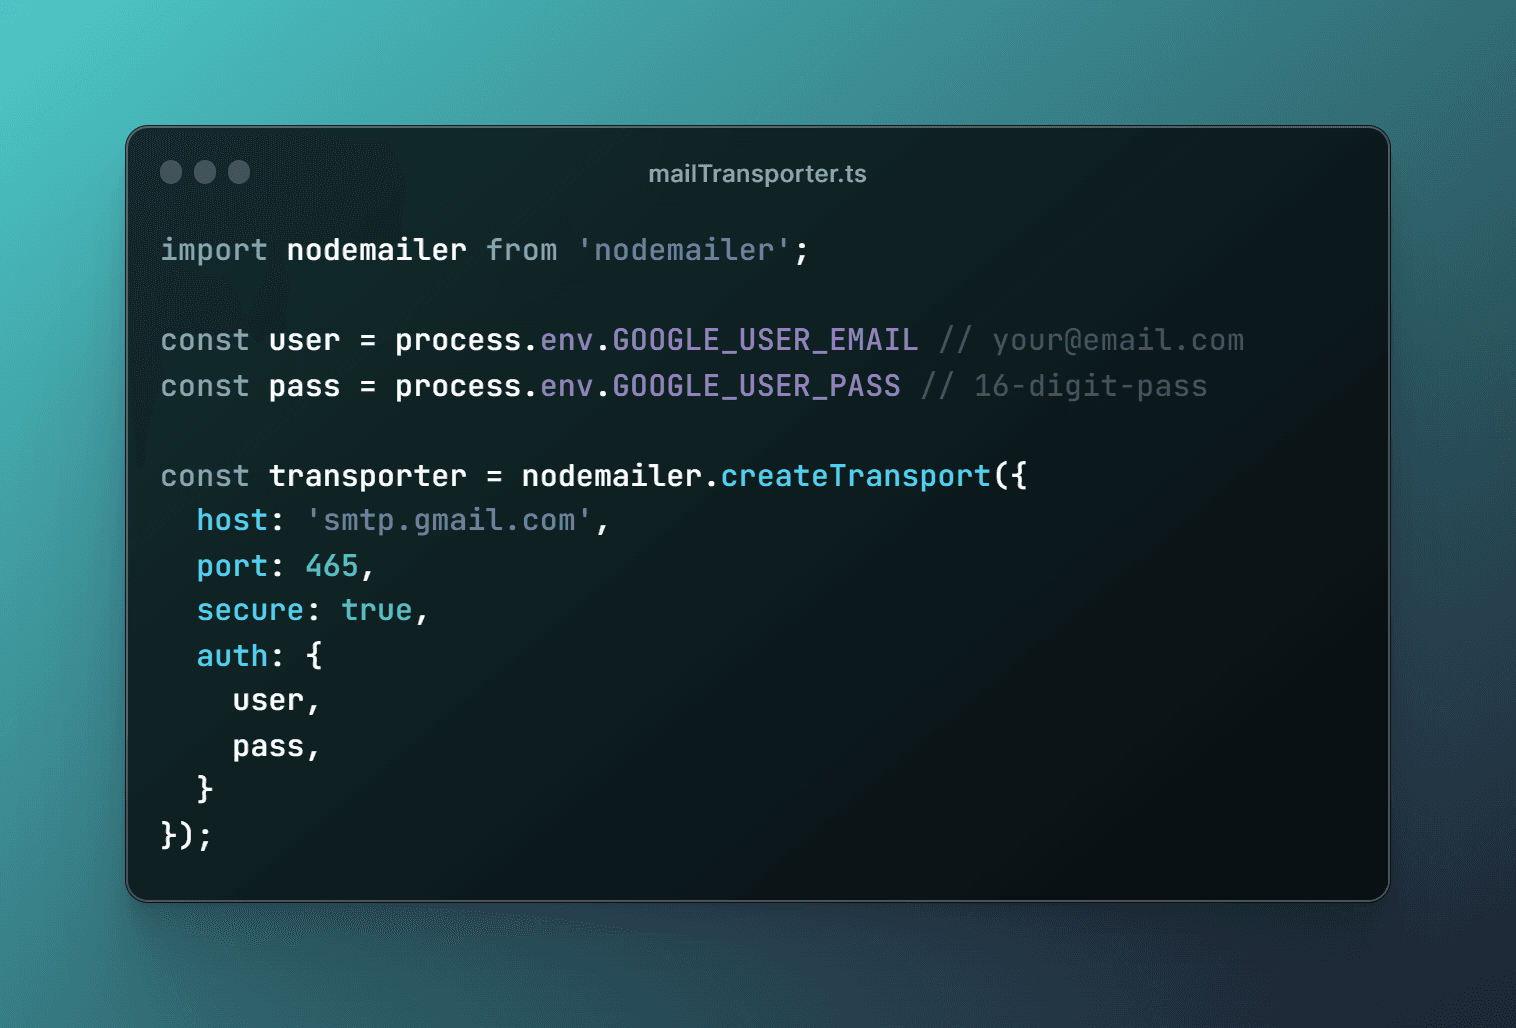
Create Nodemailer transporter
SMTP (Simple Mail Transfer Protocol) is the most common transporter, and below we will describe it in more detail, as well as demonstrate some examples.
NOTE: host & port may differ for each email service provider*
But there is a list of other available options:
- Built-in transports
- sendmail, a regular sendmail command for simple messages. It’s similar to the mail() function in PHP
- SES , to handle large traffic of emails by sending them using Amazon SES
- stream, a buffer for testing purposes, to return messages.
- External transport. To put it simply, you can create your own transportation method.
For more details, refer to the Nodemailer documentation.
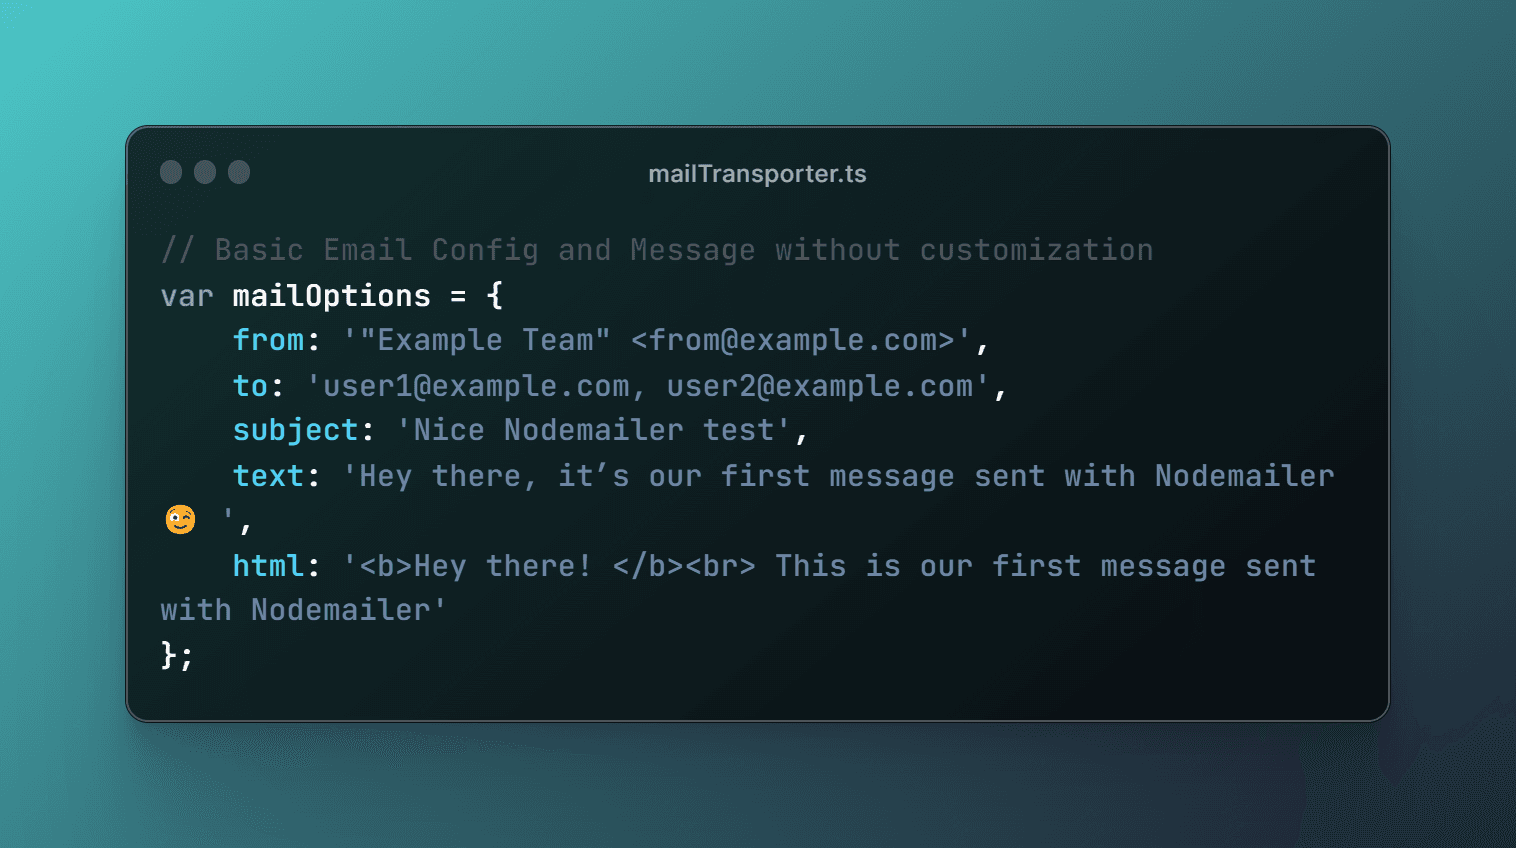
Set Nodemailer message options
At this point, we should specify the email sender, receiver, and the content of the message. Remember, Unicode is supported, so you can include emojis, even in the subject line!
To send a text formatted as HTML, no extra attributes are required, just put your HTML body into the message with an html attribute. For advanced templates, you can add attachments and embed images.
Deliver a message with sendMail()
Once we created a transporter and configured a message, we can send it using the sendMail() method:

This was just about how to setup SMTP in nodemailer to send basic email without any styling or any fancy images.
Next, we will learn how to do all the styling and fancy stuff with React Mail components. Get Excited..!🚀😉
What is React Mail?
Before we head into email customization, we need to know what React Mail is and why it is used most amongst developer.
React Mail is made up of quality, unstyled components that enable us to create emails with React and TypeScript. This library offers a utility function to compile JSX code into email-friendly HTML that will render seamlessly across all popular email clients.
How to use React Mail: From Installation
To use React Mail you are just one step away, to install dependencies. You can install React Mail with npm, yarn or pnpm with the command below.
Install dependencies
Get the @react-email/render packages.
npm install @react-email/render
or
yarn add @react-email/render
or
pnpm add @react-email/render
How to customize emails with React Mail?
To customize email you have to create a .tsx or .jsx file with React Mail's custom components as shown:
Create an email using React
Start by building your email template in a .jsx or .tsx file.
React Mail provides its own Custom Components for customizing email.

P.S: you can also use html tags e.g. <p> & <span> (not recommended)
For more details, refer to the React Mail documentation.
Sending customized email with Nodemailer.
Once we are ready with the custom email template with React Email & STMP for Nodemailer, we can proceed with sending the email.
Convert to HTML and send email
Import the email template you just built, convert into a HTML string, and use the Nodemailer SDK or to send it.
I've used API routes in NextJS to send emails with Nodemailer & React Mail.
The final code should look like this:
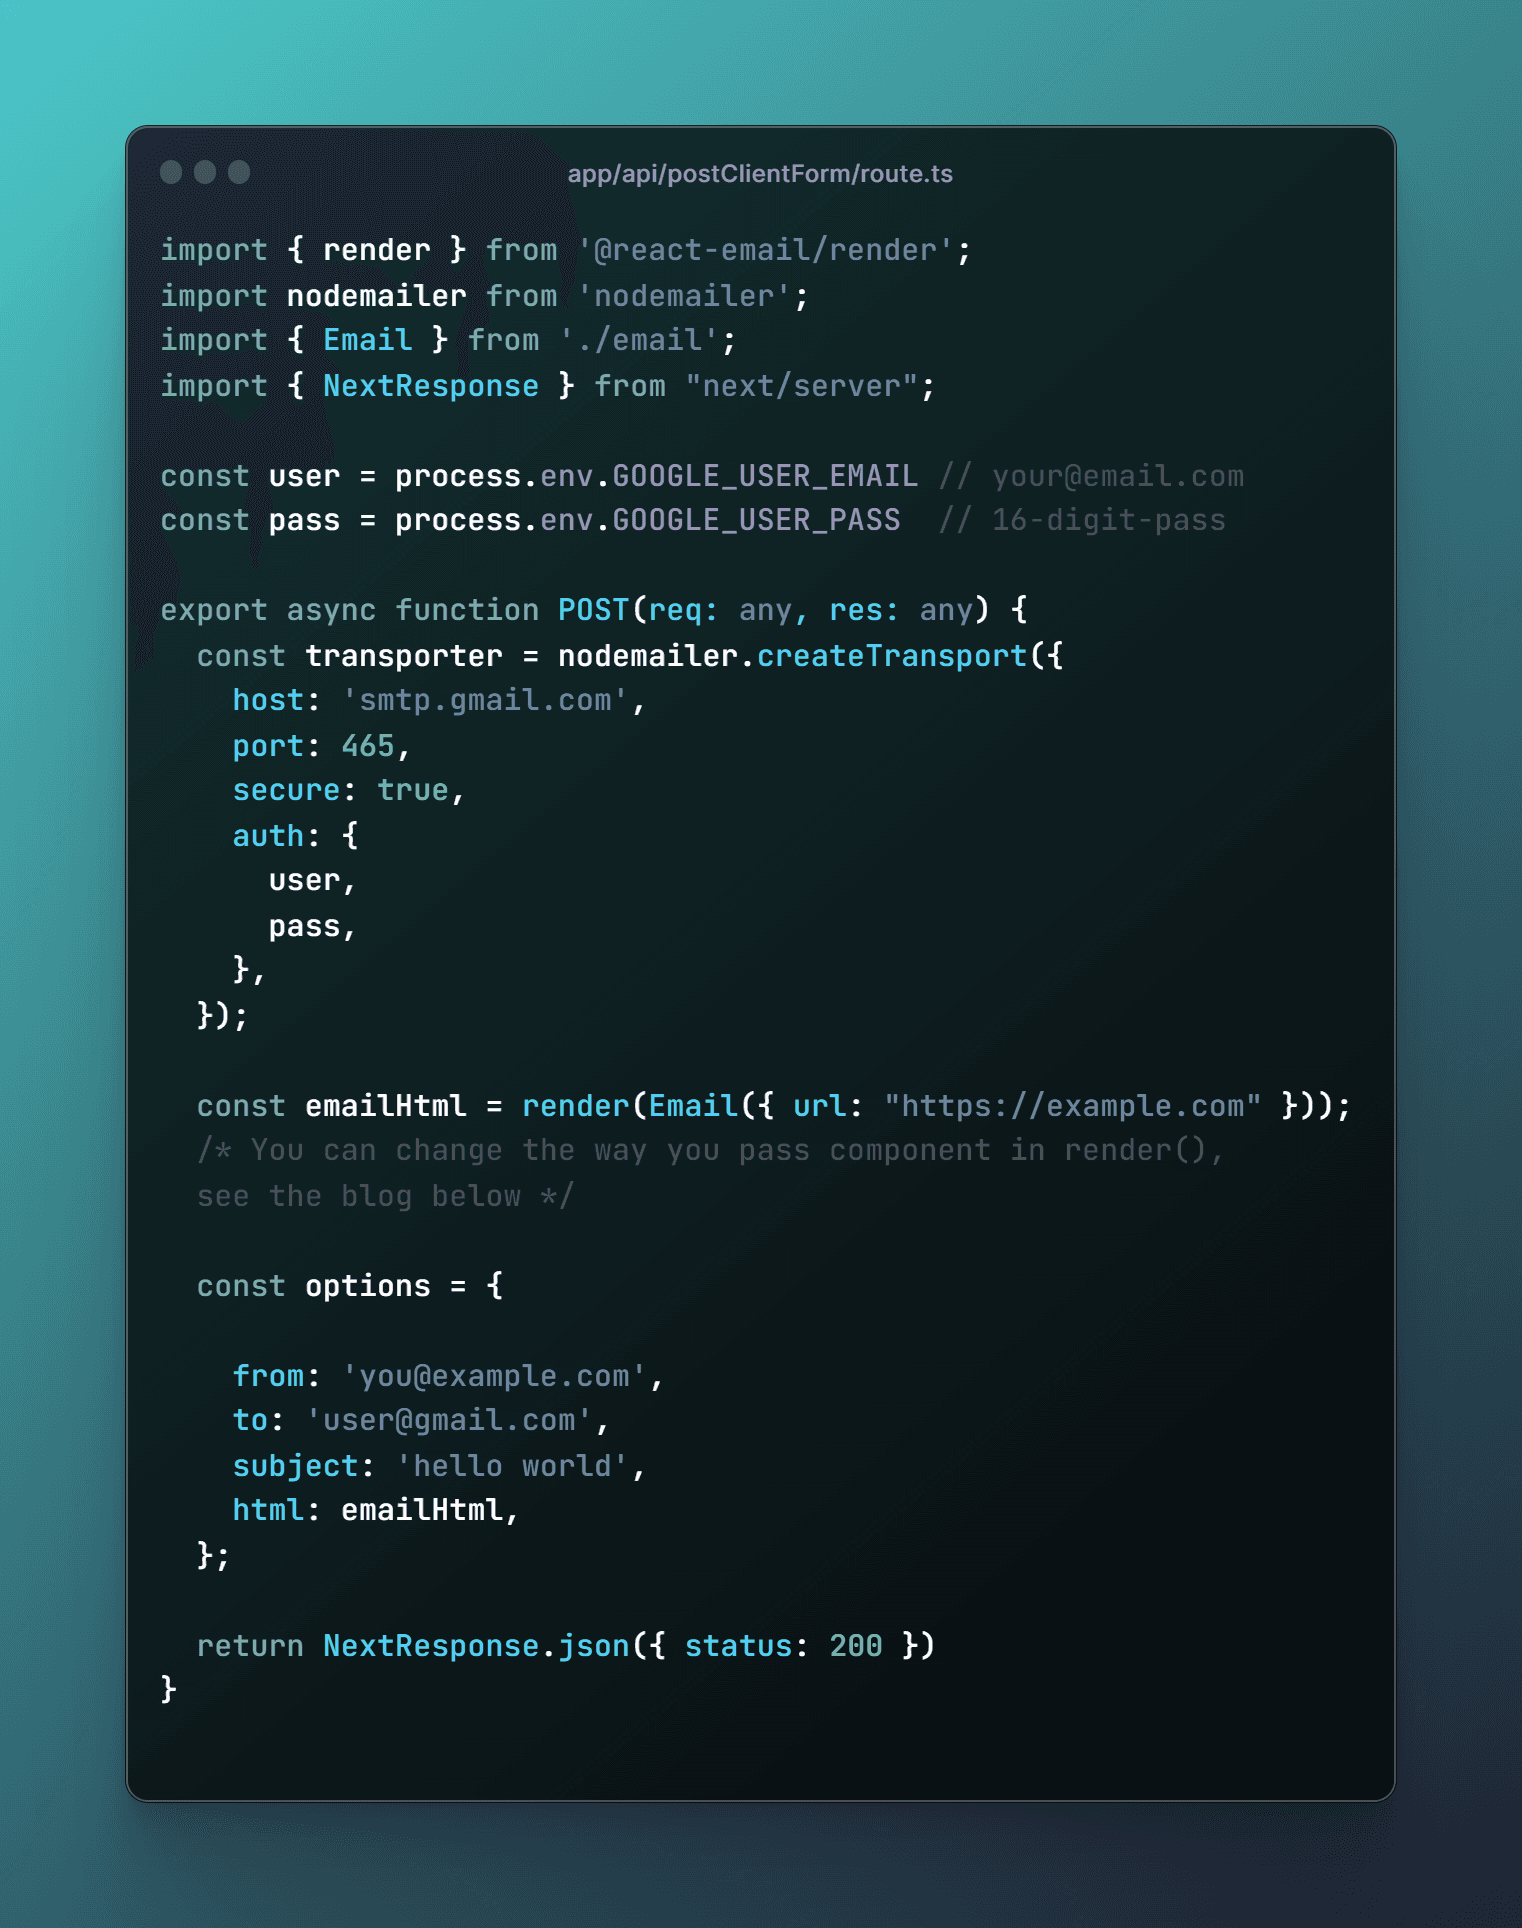
For NodeJS (.ts or .js).
const emailHtml = render(Email({ url: "https://example.com" }));
For React (.tsx or .jsx).
const emailHtml = render(<Email url="https://example.com" />);
That's It
Impress your client with thoes professional emails. Happy Coding..! 😉